Recent Posts...

Installing The Fan/Heatsink Assembly

A boxed Pentium 4 processor includes a high quality unattached fan heatsink specifically designed to provide sufficient cooling to the Pentium 4 processor when used in a suitable chassis environment.

The fan heatsink and clip assembly (A) comprises:
B: Clip frame
C: Clip levers
D: Clip frame corners
E: Clip frame latch
F: Retention mechanism hook.

and attaches to the motherboard-mounted retention mechanism (G).    

FitHeatSink1

Normally, there will be thermal interface material attached to the bottom of the processor's fan heatsink. Take care not to damage this. Alternatively, use the enclosed syringe to apply all of the thermal interface material provided to the IHS surface of the processor.

Align the heatsink and clip assembly with the retention mechanism (the fan heatsink is symmetrical) and place it on the processor. Allow the heatsink base to compress (without rotating or twisting) the thermal interface material over the surface of the processor's integrated heat spreader.    

FitHeatSink2

With the clip levers in the upward position, push down on all four clip frame corners to secure the clip frame latches to the retention mechanism hooks, making sure the processor fan cable is free from any obstruction and is not trapped under clip frame.    

FitHeatSink3

It is important to not allow the heatsink to rotate or twist on the processor's integrated heat spreader. Securing the fan heatsink while closing the clip levers will ensure the thermal interface material is not damaged and the processor will operate correctly.

Close the clips levers in opposing directions, one at a time. The levers require some force to be completely closed.    

FitHeatSink4

First, close clip lever 1 while holding the topside of the fan heatsink with your hand.  

  FitHeatSink5

Then, close clip lever 2 while holding the topside of the fan heatsink with your other hand.

Once the clip levers are closed, verify that the heatsink is securely retained and that the clip frame latches are properly engaged with the retention mechanism hooks.    

FitHeatSink6

Finally, connect the processor fan cable to the motherboard fan power header. Consult the motherboard manual to determine the correct fan header to use.    

FitHeatSink7

When installed, the fan heatsink and clip assembly may cause the motherboard to slightly bend or flex. This is nothing to be concerned about, and provides the proper mechanical support for the processor (with attached fan heatsink and clip assembly) and helps prevent against damage during system shipment.
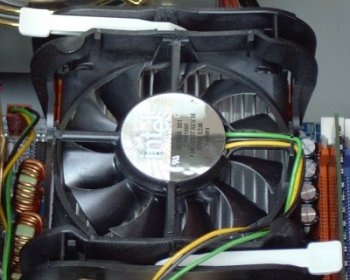
FitHeatSink8

Installing The Fan/Heatsink Assembly

A boxed Pentium 4 processor includes a high quality unattached fan heatsink specifically designed to provide sufficient cooling to the Pentium 4 processor when used in a suitable chassis environment.

The fan heatsink and clip assembly (A) comprises:
B: Clip frame
C: Clip levers
D: Clip frame corners
E: Clip frame latch
F: Retention mechanism hook.

and attaches to the motherboard-mounted retention mechanism (G).    

FitHeatSink1

Normally, there will be thermal interface material attached to the bottom of the processor's fan heatsink. Take care not to damage this. Alternatively, use the enclosed syringe to apply all of the thermal interface material provided to the IHS surface of the processor.

Align the heatsink and clip assembly with the retention mechanism (the fan heatsink is symmetrical) and place it on the processor. Allow the heatsink base to compress (without rotating or twisting) the thermal interface material over the surface of the processor's integrated heat spreader.    

FitHeatSink2

With the clip levers in the upward position, push down on all four clip frame corners to secure the clip frame latches to the retention mechanism hooks, making sure the processor fan cable is free from any obstruction and is not trapped under clip frame.    

FitHeatSink3

It is important to not allow the heatsink to rotate or twist on the processor's integrated heat spreader. Securing the fan heatsink while closing the clip levers will ensure the thermal interface material is not damaged and the processor will operate correctly.

Close the clips levers in opposing directions, one at a time. The levers require some force to be completely closed.    

FitHeatSink4

First, close clip lever 1 while holding the topside of the fan heatsink with your hand.  

  FitHeatSink5

Then, close clip lever 2 while holding the topside of the fan heatsink with your other hand.

Once the clip levers are closed, verify that the heatsink is securely retained and that the clip frame latches are properly engaged with the retention mechanism hooks.    

FitHeatSink6

Finally, connect the processor fan cable to the motherboard fan power header. Consult the motherboard manual to determine the correct fan header to use.    

FitHeatSink7

When installed, the fan heatsink and clip assembly may cause the motherboard to slightly bend or flex. This is nothing to be concerned about, and provides the proper mechanical support for the processor (with attached fan heatsink and clip assembly) and helps prevent against damage during system shipment.

FitHeatSink8

1 Comments:

Do you have any suggestions? Add your comment. Please don't spam!
Subscribe to my feeds | Subscribe comments feeds
  1. Anonymous Comment at : Saturday, 15 August, 2009

    On an IBM ThinkCentre Desktop there's a heatsink + fan. If I run a Disk Clean-up (Old Compress Files) and/or a full disk Virus Scan, after about 5-10 mins. the pc switches off. I suspected a cooling problem. I removed the fan and heatsink and cleaned it from a thick layer of dust. I (carefully) replaced the whole lot but I have doubts about the directly of the airflow from the fan.
    Should it BLOW cooler air into the heatsink or EXTRACT warm air from it?
    Irrelevant of the airflow direction, I still get the switch-off after 5-10 mins of disk processing. Confused?
    Thanks for an answer, rodape45@hotmail.com

Post a Comment

Do you have any suggestions? Add your comment. Please don't spam!